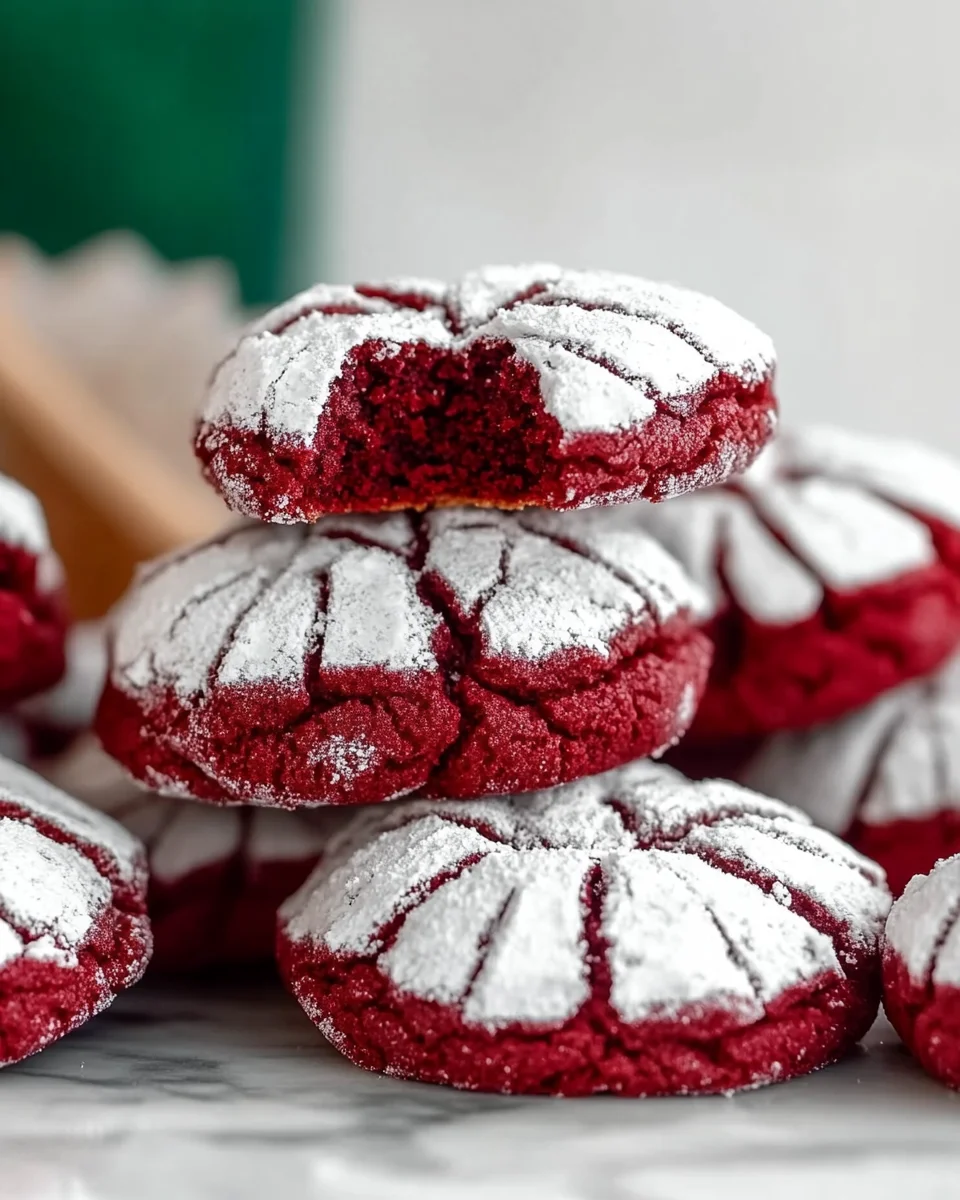
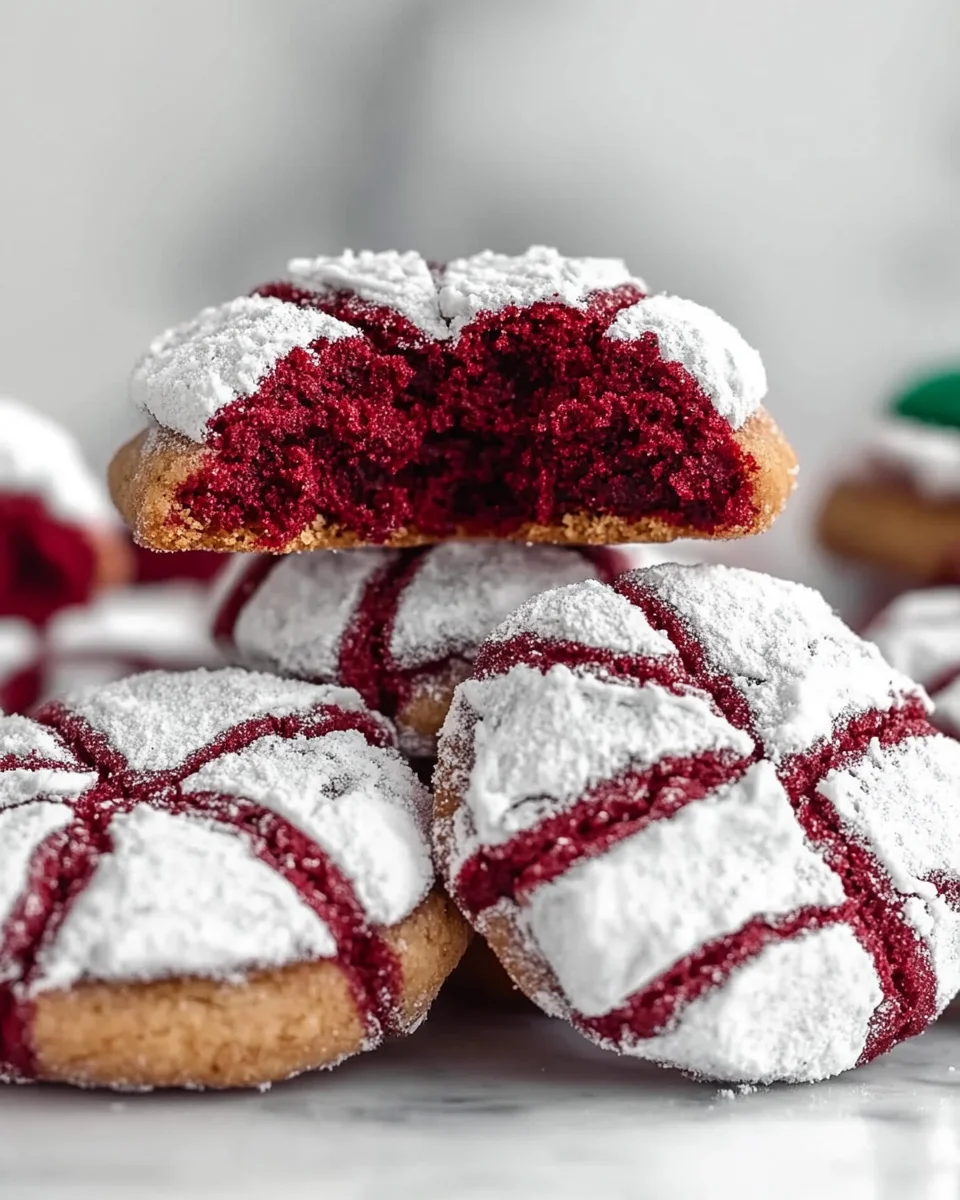
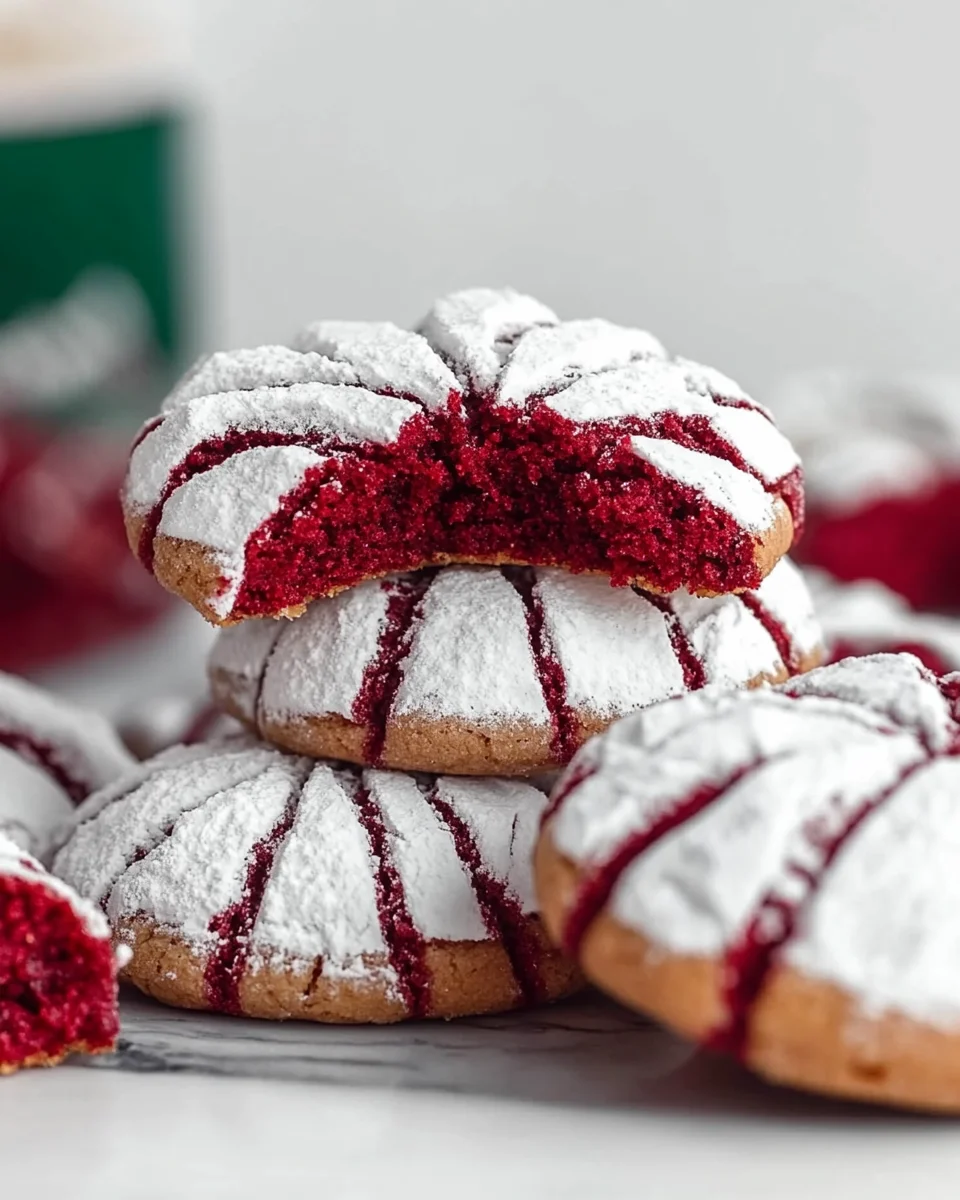
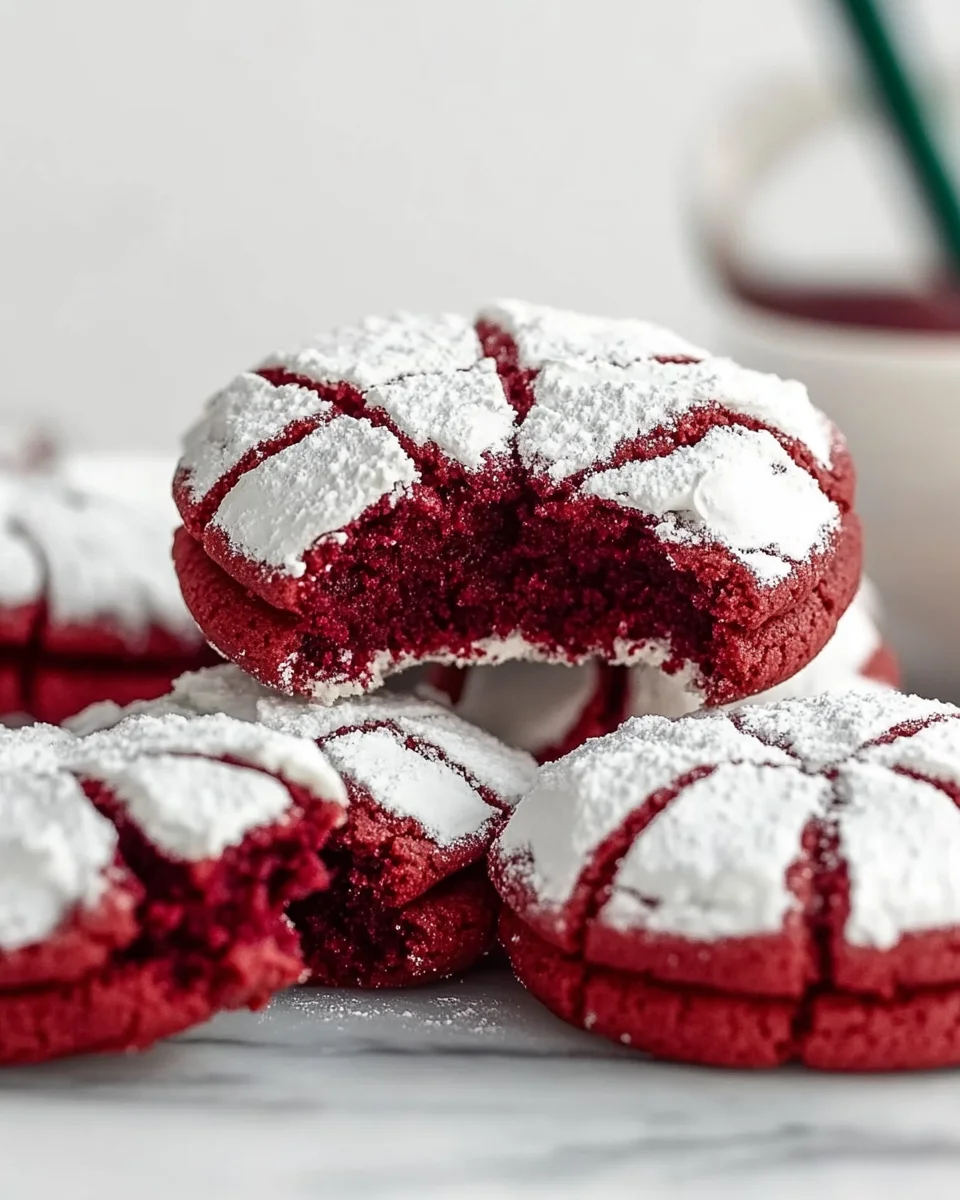
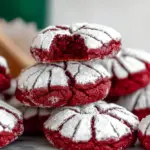
A sweet and indulgent treat, these red velvet crinkle cookies combine the rich flavor of cocoa with a hint of vanilla. Their soft, crackled appearance makes them as delightful to look at as they are to eat! Perfect for holidays or special occasions, these cookies add a pop of color and flavor to any dessert table.
Why You’ll Love This Recipe
- Easy to Make: With simple steps, you can whip up these cookies quickly.
- Rich Flavor: The combination of cocoa and vanilla creates a deliciously unique taste.
- Visually Stunning: Their crackled appearance makes them an eye-catching addition to any gathering.
- Versatile Treat: These cookies are perfect for holidays, parties, or just a cozy night in.
- Fun for Kids: Involving kids in the rolling and decorating process is enjoyable!
Tools and Preparation
Before you start baking your red velvet crinkle cookies, gather the necessary tools. Having everything ready will make the process smoother.
Essential Tools and Equipment
- Mixing bowls
- Parchment paper
- Baking sheets
- Whisk
- Electric mixer (or whisk)
- Cookie scoop
Importance of Each Tool
- Mixing bowls: Essential for combining ingredients without mess.
- Parchment paper: Prevents sticking and ensures easy cleanup on baking sheets.
- Electric mixer: Saves time and effort when creaming butter and sugar.
Ingredients
For the Cookies
- 1 1/2 cups all-purpose flour
- 1/2 cup unsweetened cocoa powder
- 1 teaspoon baking powder
- 1/4 teaspoon salt
- 1/2 cup unsalted butter, softened
- 1 cup granulated sugar
- 2 large eggs
- 1 teaspoon vanilla extract
- 1 tablespoon red food coloring
For Rolling
- 1/2 cup powdered sugar (for rolling)
How to Make Red Velvet Crinkle Cookie
Step 1: Preheat the Oven
Preheat your oven to 350°F (175°C). Line two baking sheets with parchment paper and set them aside.
Step 2: Mix Dry Ingredients
In a medium bowl, whisk together the following:
1. All-purpose flour
2. Cocoa powder
3. Baking powder
4. Salt
This dry mixture will provide structure to your cookies.
Step 3: Cream Butter and Sugar
In a large mixing bowl, beat together:
1. Softened butter
2. Granulated sugar
Mix until light and fluffy, about 2–3 minutes.
Step 4: Add Eggs and Flavorings
Add the eggs one at a time, mixing well after each addition. Then mix in:
– Vanilla extract
– Red food coloring
Ensure everything is evenly combined for that beautiful red hue.
Step 5: Combine Mixtures
Gradually incorporate the dry mixture into the wet ingredients. Mix just until combined; the dough will be soft and slightly sticky.
Step 6: Chill the Dough
Cover the dough with plastic wrap and refrigerate for at least 30 minutes. Chilling helps make handling easier and ensures that your cookies keep their shape.
Step 7: Prepare for Baking
Scoop chilled dough into 1-inch balls using a cookie scoop. Roll each ball generously in powdered sugar, coating completely.
Step 8: Bake Cookies
Place the balls on prepared baking sheets, leaving about 2 inches of space between them. Bake for 10–12 minutes until set but still soft in the center. They should have a distinctive crackled top.
Step 9: Cool Down
Allow cookies to cool on the baking sheet for a few minutes before transferring them to a wire rack to cool completely.
Enjoy your freshly baked red velvet crinkle cookies!
How to Serve Red Velvet Crinkle Cookie
Red velvet crinkle cookies are a delightful treat that can be enjoyed in many ways. Whether you’re celebrating a special occasion or just indulging yourself, here are some serving suggestions to enhance your experience.
With a Glass of Milk
- A classic pairing, milk complements the rich flavor of red velvet crinkle cookies perfectly. The creaminess of milk balances the sweetness and texture of the cookies.
As Dessert Sandwiches
- Create dessert sandwiches by placing a scoop of ice cream between two cookies. This makes for an indulgent treat that is sure to impress guests!
With Fresh Berries
- Serve alongside fresh strawberries or raspberries for a fruity contrast. The tartness of the berries enhances the sweetness of the cookies.
Topped with Cream Cheese Frosting
- For an extra layer of flavor, spread a thin layer of cream cheese frosting on top of each cookie. This adds a delicious tangy taste that pairs beautifully with red velvet.
At Holiday Parties
- These cookies make festive treats during holidays. Their vibrant color and unique appearance are perfect for Christmas or Valentine’s Day celebrations.
How to Perfect Red Velvet Crinkle Cookie
Achieving the perfect red velvet crinkle cookie requires attention to detail. Here are some tips to help you master this delightful recipe.
- Chill the Dough: Refrigerating the dough for at least 30 minutes is crucial for achieving that signature crinkle effect and preventing spreading during baking.
- Use Quality Ingredients: Opt for high-quality cocoa powder and vanilla extract to enhance the overall flavor profile of your cookies.
- Don’t Overmix: When combining wet and dry ingredients, mix just until combined. Overmixing can lead to tough cookies.
- Measure Accurately: Use precise measurements for flour and cocoa powder to ensure consistent results. Too much flour can make cookies dry.
- Keep an Eye on Baking Time: Cookies are done when they look set but still soft in the center. Overbaking will result in dry cookies.
- Let Them Cool Properly: Allow cookies to cool on the baking sheet before transferring them to a wire rack. This helps maintain their soft texture.
Best Side Dishes for Red Velvet Crinkle Cookie
While red velvet crinkle cookies are delicious on their own, they can also be paired with various side dishes for an enhanced experience. Here are some great options:
- Cream Cheese Frosting: A sweet and tangy topping that complements the flavors of red velvet beautifully.
- Vanilla Ice Cream: The creamy texture balances out the chewy cookie, making it a perfect dessert duo.
- Fruit Salad: A refreshing fruit salad adds a light touch that contrasts nicely with the rich sweetness of the cookies.
- Chocolate Sauce: Drizzle chocolate sauce over your cookies for an extra indulgent treat that adds richness.
- Coffee or Espresso: Enjoy these cookies with a warm cup of coffee or espresso; the bitterness cuts through the sweetness effectively.
- Hot Cocoa: Pairing with hot cocoa creates a cozy dessert experience, ideal for cold winter days.
- Whipped Cream: A dollop of whipped cream can elevate your serving while adding lightness to each bite.
- Cheese Platter: For something different, serve with a selection of cheeses; sharp cheeses can balance out sweet flavors well.
Common Mistakes to Avoid
When making red velvet crinkle cookies, avoiding common pitfalls can enhance your baking experience. Here are some mistakes to watch out for:
- Not Chilling the Dough: Failing to chill the dough can lead to cookies that spread too much while baking. Make sure to refrigerate for at least 30 minutes to maintain their shape.
- Skipping the Parchment Paper: Baking directly on a pan without parchment paper may cause cookies to stick and burn. Always line your baking sheets for easier cleanup and better cookie release.
- Overmixing the Batter: Mixing the cookie dough too much can result in tough cookies. Mix until just combined for a softer texture.
- Neglecting Oven Temperature Accuracy: An inaccurate oven temperature can affect baking time and cookie texture. Always preheat your oven and consider using an oven thermometer.
- Using Old Ingredients: Expired baking powder or stale flour can ruin your cookies. Check expiration dates before you start baking.
- Not Using Enough Food Coloring: If you want vibrant red velvet cookies, be generous with the food coloring. A lack of color may leave you with dull-looking cookies.
Refrigerator Storage
- Store red velvet crinkle cookies in an airtight container.
- They will last up to 5 days in the refrigerator.
- Place parchment paper between layers of cookies to prevent sticking.
Freezing Red Velvet Crinkle Cookie
- Freeze baked cookies in a single layer on a baking sheet first.
- Once frozen, transfer them to a freezer-safe bag or container.
- They can be stored for up to 3 months in the freezer.
Reheating Red Velvet Crinkle Cookie
- Oven: Preheat to 350°F (175°C) and heat for about 5-7 minutes until warm.
- Microwave: Heat one cookie at a time for about 10-15 seconds; watch carefully not to overheat.
- Stovetop: Use a skillet on low heat, cover it, and warm for about 2-3 minutes.
Frequently Asked Questions
What makes red velvet crinkle cookie different from regular cookies?
Red velvet crinkle cookies have a distinct red color and cocoa flavor, along with a soft, chewy texture that sets them apart from traditional cookies.
Can I use different food coloring for my red velvet crinkle cookie?
Absolutely! Feel free to experiment with other colors, such as green or blue, for themed occasions or fun variations.
How should I store leftover red velvet crinkle cookie?
Store them in an airtight container at room temperature or refrigerate them if you plan to keep them longer than a few days.
Can I freeze red velvet crinkle cookie?
Yes, these cookies freeze well! You can keep them in an airtight container or freezer bag for up to three months.
What is the best way to achieve the crackled top on my red velvet crinkle cookie?
Chilling the dough before baking is essential as it helps create that signature crackled appearance while keeping the edges intact.
Final Thoughts
These red velvet crinkle cookies are not only visually stunning but also incredibly delicious. Their unique flavor and inviting texture make them perfect for any occasion. Whether you choose to customize them with different colors or flavors, they will surely impress family and friends. Don’t hesitate—give this delightful recipe a try!
Red Velvet Crinkle Cookies
- Total Time: 27 minutes
- Yield: Approximately 24 cookies 1x
Description
Indulge in the delightful experience of baking with these Red Velvet Crinkle Cookies. Combining rich cocoa flavor with a hint of vanilla, these cookies are not only a feast for the eyes with their stunning crackled tops but also a treat for the taste buds. Perfect for festive gatherings or cozy nights at home, they bring a charming pop of color and flavor to any dessert table. With straightforward preparation steps, even novice bakers can whip up this sweet indulgence effortlessly. Gather your loved ones and enjoy the fun of rolling and decorating these cookies together!
Ingredients
- 1 1/2 cups all-purpose flour
- 1/2 cup unsweetened cocoa powder
- 1 teaspoon baking powder
- 1/4 teaspoon salt
- 1/2 cup unsalted butter (softened)
- 1 cup granulated sugar
- 2 large eggs
- 1 teaspoon vanilla extract
- 1 tablespoon red food coloring
- 1/2 cup powdered sugar (for rolling)
Instructions
- Preheat oven to 350°F (175°C) and line two baking sheets with parchment paper.
- In a medium bowl, whisk together flour, cocoa powder, baking powder, and salt.
- In a large mixing bowl, cream softened butter and granulated sugar until light and fluffy.
- Add eggs one at a time, mixing well after each addition, then incorporate vanilla extract and red food coloring.
- Gradually mix dry ingredients into the wet mixture until just combined; the dough will be soft and slightly sticky.
- Chill the dough covered in plastic wrap for at least 30 minutes in the refrigerator.
- Scoop chilled dough into 1-inch balls using a cookie scoop and roll in powdered sugar to coat completely.
- Place on prepared baking sheets with about 2 inches between each ball and bake for 10–12 minutes until set but still soft in the center.
- Allow cooling on the baking sheet for a few minutes before transferring to a wire rack.
- Prep Time: 15 minutes
- Cook Time: 12 minutes
- Category: Dessert
- Method: Baking
- Cuisine: American
Nutrition
- Serving Size: 1 cookie (30g)
- Calories: 120
- Sugar: 10g
- Sodium: 50mg
- Fat: 5g
- Saturated Fat: 3g
- Unsaturated Fat: 2g
- Trans Fat: 0g
- Carbohydrates: 17g
- Fiber: <1g
- Protein: <1g
- Cholesterol: 20mg
Leave a Comment