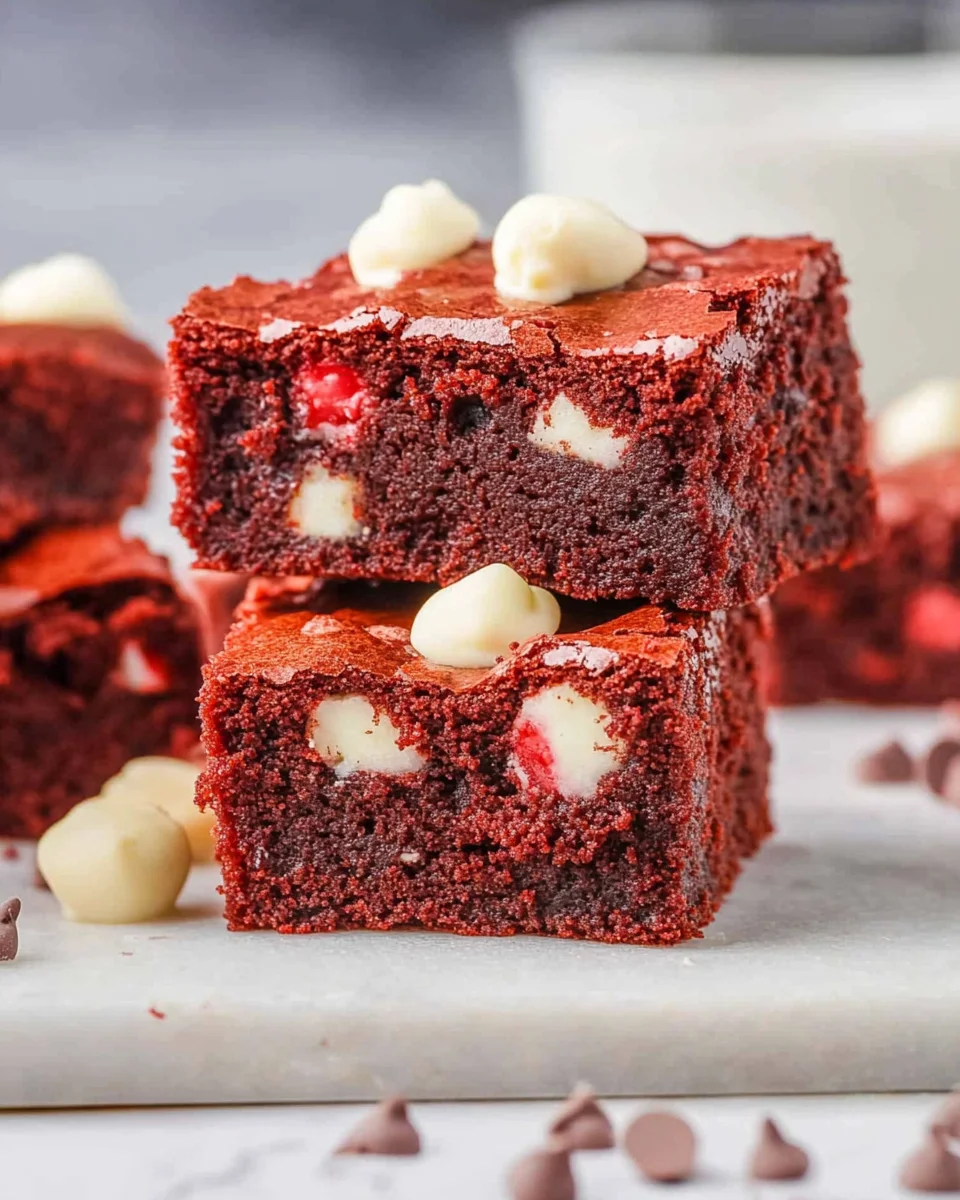
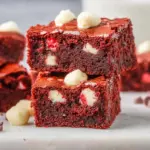
These rich and fudgy Red Velvet Brownies are a delightful twist on the classic dessert. They are filled with sweet white chocolate chips and offer a subtle cocoa flavor that makes them a must-try. With their soft, moist texture and vibrant red hue, these brownies are perfect for holidays, parties, or any time you’re craving something decadent. Their unique combination of flavors and eye-catching color will surely impress your guests!
Why You’ll Love This Recipe
- Decadent Flavor: The combination of cocoa and white chocolate creates a rich taste that is irresistible.
- Easy to Make: With simple steps, even novice bakers can whip up these delicious brownies.
- Versatile Treats: Ideal for celebrations like Valentine’s Day or just a cozy evening at home.
- Visually Stunning: The vibrant red color makes these brownies not only delicious but also beautiful to serve.
- Fudgy Texture: Each bite melts in your mouth, providing a satisfying dessert experience.
Tools and Preparation
Before you start baking your Red Velvet Brownies, gather the necessary tools. Having the right equipment will ensure your baking process goes smoothly.
Essential Tools and Equipment
- 9×9-inch baking pan
- Parchment paper
- Mixing bowls
- Whisk
- Rubber spatula
Importance of Each Tool
- 9×9-inch baking pan: The perfect size for even cooking and achieving that ideal brownie texture.
- Parchment paper: Helps prevent sticking, making it easier to remove brownies from the pan.
- Mixing bowls: Allows for easy combining of ingredients without mess.
- Rubber spatula: Great for folding in ingredients gently, ensuring the batter remains fluffy.
Ingredients
For the Brownies
- 12 tablespoons unsalted butter, melted
- 5 tablespoons unsweetened cocoa powder
- ½ teaspoon table salt
- 1¼ cups granulated sugar
- 3 eggs
- ¾ teaspoon vanilla extract
- ¾ teaspoon white vinegar
- 1 cup all-purpose flour
- 10–12 drops Wilton red food coloring (adjust to desired color)
- 1 cup white chocolate chips, divided
How to Make Red Velvet Brownies
Step 1: Preheat the Oven
Preheat your oven to 350°F (175°C). This step is crucial for achieving that perfectly baked brownie texture.
Step 2: Prepare Your Baking Pan
Line a 9×9-inch baking pan with parchment paper and spray it with nonstick cooking spray. This ensures easy removal after baking.
Step 3: Mix Wet Ingredients
In a large bowl, whisk together the melted butter, cocoa powder, salt, and sugar until fully combined.
Step 4: Add Eggs and Flavorings
Add the eggs, vanilla extract, and white vinegar to the mixture. Mix until smooth.
Step 5: Incorporate Dry Ingredients
Gently fold in the flour using a rubber spatula. Before it is completely mixed, add about 7 drops of red food coloring. Adjust more until you reach your desired shade of red.
Step 6: Add White Chocolate Chips
Fold in half a cup of white chocolate chips into the batter until evenly distributed.
Step 7: Pour and Bake
Pour the batter into your prepared baking pan and smooth out the top. Sprinkle the remaining half cup of white chocolate chips over the top. Bake for 22–25 minutes or until a toothpick inserted in the center comes out with a few moist crumbs.
Step 8: Cool and Serve
Allow the brownies to cool in the pan for at least one hour before slicing into squares and serving. Enjoy your delicious Red Velvet Brownies!
How to Serve Red Velvet Brownies
These rich and fudgy Red Velvet Brownies are a delight on their own, but you can enhance the experience with various serving suggestions. Whether for a special occasion or just a cozy night in, here are some creative ways to serve your brownies.
With Ice Cream
- Vanilla Ice Cream: A scoop of creamy vanilla ice cream pairs perfectly with the fudgy texture of the brownies.
- Mint Chocolate Chip: The refreshing taste of mint complements the chocolate notes beautifully.
Topped with Whipped Cream
- Classic Whipped Cream: Light and airy whipped cream adds a nice contrast to the dense brownies.
- Flavored Whipped Cream: Try adding a hint of vanilla or almond extract for an extra layer of flavor.
As Brownie Sundaes
- Layered Sundae: Crumble the brownies in a glass, layer with ice cream, chocolate sauce, and nuts for a decadent dessert.
- Fruit Topping: Add fresh berries like strawberries or raspberries for a fruity twist.
Dusted with Powdered Sugar
- Simple Presentation: A light dusting of powdered sugar elevates the visual appeal and adds a touch of sweetness.
How to Perfect Red Velvet Brownies
To ensure your Red Velvet Brownies turn out perfectly every time, consider these key tips.
- Bold Use Quality Ingredients: Fresh ingredients enhance flavor. Opt for high-quality cocoa powder and butter.
- Bold Don’t Overmix: Mix just until combined. Overmixing can lead to dense brownies instead of fudgy ones.
- Bold Check Oven Temperature: Use an oven thermometer to ensure your oven is at the correct temperature for even baking.
- Bold Cool Before Cutting: Let the brownies cool completely before slicing. This helps maintain their shape and texture.
Best Side Dishes for Red Velvet Brownies
While Red Velvet Brownies shine on their own, pairing them with delightful side dishes can create a well-rounded dessert experience. Here are some ideas:
- Fresh Fruit Salad: A mix of seasonal fruits adds brightness and balances the richness of the brownies.
- Chocolate Fondue: Melted chocolate provides an interactive dessert experience; dip pieces of brownie into it for extra indulgence.
- Cheese Platter: Pair with mild cheeses like brie or goat cheese to balance sweetness with savory flavors.
- Coffee or Espresso: The rich flavors of coffee enhance chocolate desserts beautifully.
- Nutty Trail Mix: Provide a crunchy contrast by serving nutty trail mix alongside your brownies.
- Dairy-Free Milkshake: A creamy milkshake complements the dessert while catering to different dietary preferences.
Common Mistakes to Avoid
When making Red Velvet Brownies, it’s easy to make some common errors. Here are a few mistakes to watch out for:
- Skipping the parchment paper: Not using parchment can lead to brownies that stick to the pan. Always line your baking pan for easy removal.
- Overmixing the batter: Mixing too vigorously can result in tough brownies. Fold in ingredients gently, especially when adding flour.
- Inaccurate oven temperature: An incorrect oven temperature can affect baking time and texture. Always preheat your oven and consider using an oven thermometer.
- Ignoring cooling time: Cutting brownies too soon can cause them to fall apart. Allow them to cool in the pan for at least one hour before slicing.
- Not measuring ingredients accurately: Incorrect measurements can lead to dry or overly dense brownies. Use proper measuring cups and spoons for accuracy.
Storage & Reheating Instructions
Refrigerator Storage
- Store Red Velvet Brownies in an airtight container.
- They will last up to 5 days in the refrigerator.
Freezing Red Velvet Brownies
- Wrap individual brownies tightly in plastic wrap or foil.
- Place them in a freezer-safe bag or container to prevent freezer burn.
- They can be frozen for up to 3 months.
Reheating Red Velvet Brownies
- Oven: Preheat your oven to 350°F (175°C). Place brownies on a baking sheet and heat for about 10 minutes until warm.
- Microwave: Heat individual brownies on a microwave-safe plate for about 15-20 seconds. Check periodically to avoid overheating.
- Stovetop: Place brownies in a skillet over low heat, covering with a lid for about 5 minutes until warmed through.
Frequently Asked Questions
Can I use cocoa powder instead of red food coloring?
You cannot replace red food coloring with cocoa powder without losing the signature color of Red Velvet Brownies. The food coloring is essential for achieving that vibrant hue.
How do I make vegan Red Velvet Brownies?
To make vegan versions, substitute eggs with flaxseed meal or applesauce, and use plant-based butter or oil instead of regular butter.
What should I serve with Red Velvet Brownies?
These delicious brownies pair well with vanilla ice cream or whipped cream for an indulgent dessert experience.
Can I add nuts or other mix-ins?
Absolutely! Feel free to add chopped nuts, chocolate chips, or even cream cheese swirls for extra flavor and texture.
How do I know when my brownies are done?
Brownies are done when a toothpick inserted into the center comes out with a few moist crumbs but not wet batter.
Final Thoughts
Red Velvet Brownies are a delightful treat that adds a pop of color and flavor to any occasion. Their fudgy texture makes them irresistible, and you can easily customize them with different mix-ins or toppings. Try making these brownies today and impress friends and family with this unique dessert!
Red Velvet Brownies
- Total Time: 40 minutes
- Yield: Approximately 16 servings 1x
Description
Indulge in the rich and fudgy delight of Red Velvet Brownies, a vibrant twist on a classic dessert. These brownies are bursting with sweet white chocolate chips and feature a subtle cocoa flavor that will have you craving more. Their moist texture and eye-catching red color make them perfect for any occasion, whether it’s a holiday gathering, a birthday party, or just a cozy night at home. Impress your guests with these decadent treats that combine both visual appeal and irresistible taste.
Ingredients
- 12 tablespoons unsalted butter, melted
- 5 tablespoons unsweetened cocoa powder
- 1¼ cups granulated sugar
- 3 large eggs
- ¾ teaspoon vanilla extract
- ¾ teaspoon white vinegar
- 1 cup all-purpose flour
- 10–12 drops red food coloring
- 1 cup white chocolate chips
Instructions
- Preheat your oven to 350°F (175°C). Line a 9×9-inch baking pan with parchment paper and spray it with nonstick cooking spray.
- In a mixing bowl, whisk together melted butter, cocoa powder, salt, and sugar until combined.
- Add the eggs, vanilla extract, and white vinegar; mix until smooth.
- Gently fold in the flour along with the red food coloring until just combined.
- Incorporate half of the white chocolate chips into the batter.
- Pour the batter into the prepared pan, smooth the top, and sprinkle the remaining chocolate chips on top.
- Bake for 22–25 minutes or until a toothpick inserted in the center comes out with a few moist crumbs.
- Let cool for at least one hour before slicing into squares.
- Prep Time: 15 minutes
- Cook Time: 25 minutes
- Category: Dessert
- Method: Baking
- Cuisine: American
Nutrition
- Serving Size: 1 brownie (50g)
- Calories: 220
- Sugar: 18g
- Sodium: 150mg
- Fat: 10g
- Saturated Fat: 6g
- Unsaturated Fat: 3g
- Trans Fat: 0g
- Carbohydrates: 31g
- Fiber: 1g
- Protein: 3g
- Cholesterol: 60mg
Leave a Comment