If you love peanut butter desserts, this Easy Peanut Butter Pie will quickly become one of your go-to recipes. Combining a crunchy Oreo crust with a smooth, creamy peanut butter filling, this no-bake pie delivers indulgent flavor with minimal effort. Perfect for busy bakers or anyone craving a rich dessert without turning on the oven, this recipe is a crowd-pleaser from start to finish.
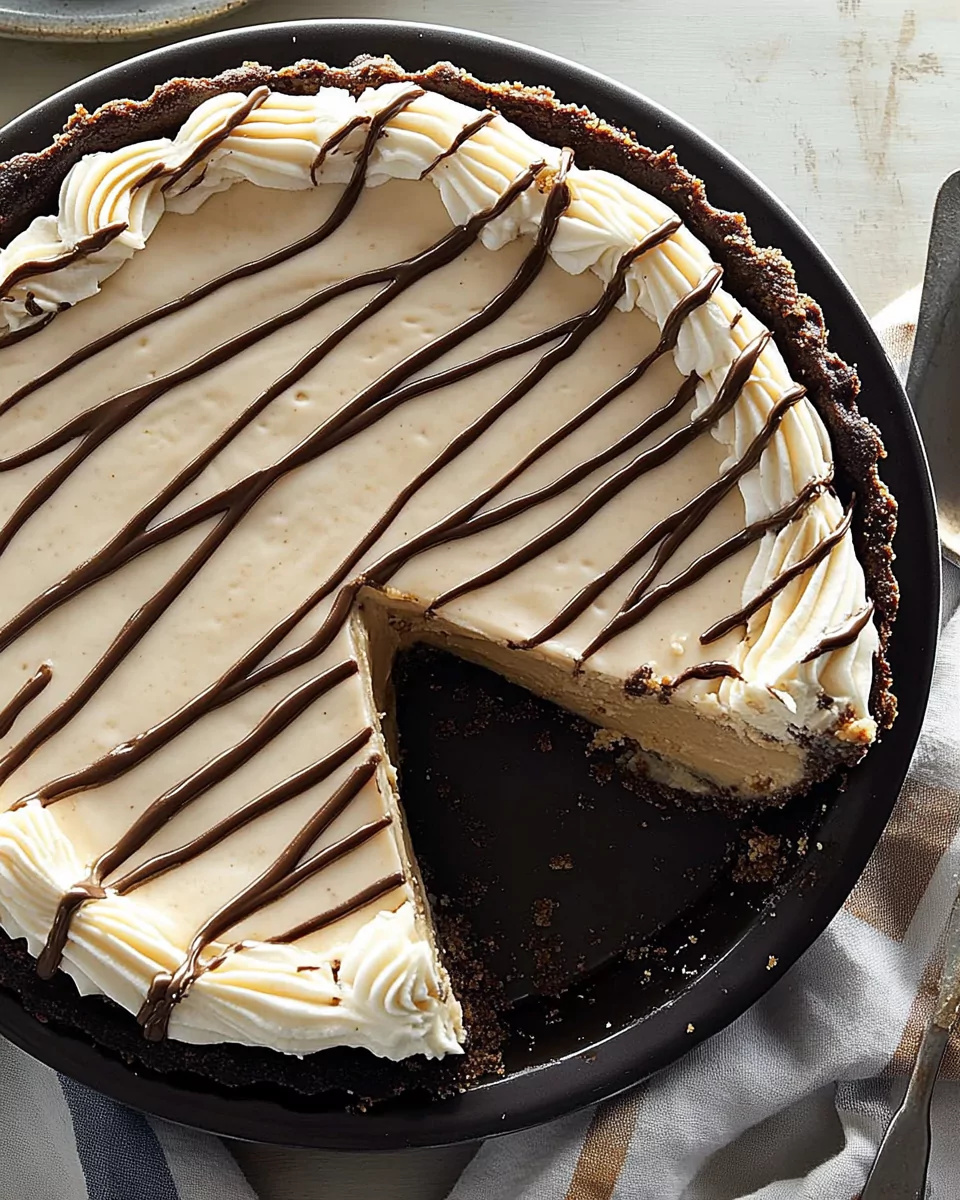
This no-bake pie is especially popular at holidays, potlucks, and casual gatherings. Its creamy peanut butter filling complements the chocolate Oreo crust perfectly, offering a sweet-salty contrast that always satisfies. The best part is its versatility — serve it chilled from the fridge for a creamy, mousse-like texture, or freeze it for an ice cream pie vibe.
Whether you are hosting a summer barbecue or preparing a make-ahead holiday dessert, this Easy Peanut Butter Pie is a simple yet impressive addition to your dessert table.
Why You Will Love This Recipe
- No baking required, making it a great summer dessert
- Uses simple pantry ingredients
- Perfect balance of sweet, salty, creamy, and crunchy
- Customizable with different toppings and crust options
- Family-friendly and ideal for peanut butter lovers
Essential Tools and Equipment
To make this Easy Peanut Butter Pie, you only need a few basic tools:
- 9-inch pie pan
- Food processor or rolling pin (to crush Oreos)
- Mixing bowls (at least two)
- Electric hand mixer or stand mixer
- Spatula for folding and spreading
Why Each Tool Matters
- A food processor ensures the Oreos are crushed into fine, even crumbs, which helps the crust hold together.
- The mixer is crucial for beating cream cheese and whipping cream to the perfect consistency.
- A spatula is key for folding whipped cream into the filling without deflating it.
Preparation Tips
- Soften the cream cheese fully before mixing to avoid lumps.
- Use regular Oreos, not double-stuffed, to get the right crust texture.
- Chill the crust for at least 30 minutes to ensure it stays firm when adding the filling.
- Whip the cream to stiff peaks separately, then gently fold into the peanut butter mixture to maintain a light and fluffy texture.
Ingredients
For the Oreo Crust
- 24 regular Oreo cookies
- 5 tablespoons unsalted butter, melted
For the Peanut Butter Filling
- 1 cup heavy whipping cream
- 2 tablespoons powdered sugar
- 8 ounces cream cheese, softened
- 1/2 cup creamy peanut butter
- 1/2 cup powdered sugar
- 1 teaspoon vanilla extract
For the Toppings
- 1/2 cup chopped peanuts
- Optional: 1/4 cup chocolate syrup
- Optional: 1/4 cup butterscotch syrup
Step-by-Step Directions
Step 1: Prepare the Oreo Crust
- Grease the 9-inch pie plate lightly.
- Crush the Oreos into fine crumbs using a food processor. If you do not have one, place cookies in a zip-top bag and crush with a rolling pin.
- In a bowl, mix the Oreo crumbs with melted butter until well combined.
- Press the mixture evenly into the bottom and up the sides of the pie pan.
- Refrigerate for at least 30 minutes to allow the crust to firm up.
Step 2: Make the Peanut Butter Filling
- In a large mixing bowl, whip the heavy cream and 2 tablespoons of powdered sugar on medium speed until stiff peaks form. Set aside.
- In another bowl, beat the softened cream cheese until smooth.
- Add the peanut butter, remaining powdered sugar, and vanilla extract. Beat until fully combined and creamy, scraping the sides as needed.
- Gently fold the whipped cream into the peanut butter mixture using a spatula. Be careful not to deflate the whipped cream.
Step 3: Assemble and Chill
- Spread the peanut butter filling evenly into the prepared Oreo crust.
- Sprinkle chopped peanuts over the top.
- If desired, drizzle with chocolate syrup or butterscotch syrup for extra sweetness and decoration.
- Refrigerate for at least 2 hours, or for a firmer texture, freeze the pie for at least 1 hour before serving.
Once your Easy Peanut Butter Pie is chilled and ready, there are several ways to serve it depending on the occasion and the texture you want.
If you want a creamy, mousse-like texture, serve the pie straight from the refrigerator. This is the perfect option for casual gatherings, where guests might enjoy a lighter, softer slice.
For a firmer, ice cream-like consistency, slice and serve the pie directly from the freezer. This option works particularly well in summer, giving the pie a refreshing, almost frozen cheesecake texture.
To enhance the presentation, consider adding one or more of the following toppings just before serving:
- Freshly whipped cream or a dollop of whipped topping
- An extra drizzle of warm chocolate or butterscotch syrup
- Mini chocolate chips, crushed peanut butter cups, or shaved chocolate
- A sprinkle of flaky sea salt to enhance the sweet-salty balance
For special occasions, you could even pipe decorative whipped cream swirls around the edge of the pie and garnish each swirl with a peanut butter cup half or a chocolate curl.
This pie pairs beautifully with coffee, milk, or even a light dessert wine if serving to adults.
Eight Perfect Side Dishes for Easy Peanut Butter Pie
While this dessert can certainly stand on its own, pairing it with a complementary side can create a complete dessert experience. Here are eight creative options:
- Fresh Berry Salad — A medley of strawberries, blueberries, and raspberries offers a tart contrast to the rich, creamy filling.
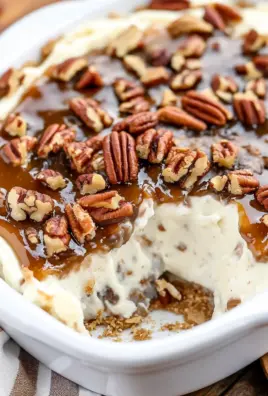
- Salted Caramel Ice Cream — Double down on decadence with a scoop of ice cream alongside your pie slice.
- Chocolate-Dipped Pretzels — The salty crunch of pretzels complements the sweetness of the pie, enhancing the sweet-salty flavor combination.
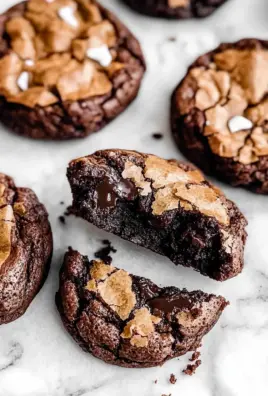
- Peanut Butter Cookies — Serve mini peanut butter cookies alongside each slice for an ultra-themed dessert plate.
- Espresso or Iced Coffee — The bitterness of coffee balances the richness of peanut butter and chocolate, creating a refined flavor pairing.
- Vanilla Milkshake — For a retro diner-style dessert, serve a small vanilla milkshake on the side.
- Light Green Salad — If serving this pie after a heavy meal, consider a simple arugula or spinach salad to cleanse the palate before dessert.
- Mixed Nuts and Trail Mix — For a casual spread, offer a small bowl of roasted nuts or peanut butter-flavored trail mix for guests to snack on between bites of pie.
Common Mistakes and How to Avoid Them
Even though Easy Peanut Butter Pie is straightforward, there are a few common pitfalls that can affect the final result. Here is a list of typical mistakes and the best ways to avoid them:
1. Crust Crumbles When Cutting
This usually happens if the crust was not packed firmly enough into the pan or if it was not properly chilled. Press the crust down tightly with the back of a measuring cup and always chill for at least 30 minutes before adding the filling.
2. Lumpy Peanut Butter Filling
Lumps in the filling often result from using cold cream cheese. To avoid this, allow the cream cheese to soften completely at room temperature before mixing.
3. Over-Whipped Cream
Over-whipping the cream can cause it to become grainy, making the filling denser than intended. Whip only until stiff peaks form, then immediately fold it into the peanut butter mixture.
4. Filling is Too Soft or Runny
This may happen if the whipped cream was under-whipped or if the pie was not chilled long enough. Ensure your cream holds stiff peaks and always allow the pie to chill for at least two hours, preferably longer for the best texture.
5. Overloaded Toppings
While toppings are fun, piling on too many can weigh down the filling or make slicing messy. Keep it simple with a sprinkle of peanuts and a light drizzle of syrup. If you want more toppings, serve them on the side so guests can customize their slices.
6. Pie Does Not Set Properly
This can happen if the filling ingredients were too warm when combined. Use cold heavy cream and ensure the whipped cream is folded into the filling gently, preserving the structure. A properly chilled pie will slice cleanly and hold its shape.
Pro Tips for Perfect Easy Peanut Butter Pie
To make sure your Easy Peanut Butter Pie comes out flawless every time, follow these expert tips.
Use Full-Fat Cream Cheese
Reduced-fat cream cheese has a higher water content, which can make the filling too soft or watery. Full-fat cream cheese ensures a rich, creamy texture that holds up better after chilling.
Whip the Cream Separately
Do not try to shortcut the process by mixing the cream directly into the peanut butter and cream cheese. Whipping the cream on its own until stiff peaks form guarantees a lighter, airier filling. Folding it into the peanut butter mixture gently keeps the filling smooth and fluffy.
Slightly Warm the Peanut Butter
If your peanut butter is thick or difficult to stir, microwave it for 10 to 15 seconds until slightly softened. This helps it blend seamlessly into the cream cheese mixture without overmixing.
Freeze the Crust for Extra Firmness
For an especially sturdy crust, freeze it instead of refrigerating before adding the filling. This is particularly useful if you plan to transport the pie or cut very clean slices.
Customize the Toppings
While chopped peanuts and chocolate drizzle are classic, you can easily personalize this pie with creative toppings like mini peanut butter cups, chocolate shavings, or a swirl of caramel sauce. For a holiday touch, sprinkle crushed candy canes on top during the winter season.
Storage and Reheating Instructions
In the Refrigerator
Store your Easy Peanut Butter Pie covered tightly with plastic wrap or foil. It will keep well in the refrigerator for up to five days. For best results, place it on a flat surface where it will not be bumped or tilted, which could cause the filling to shift.
In the Freezer
For longer storage, freeze the pie for up to two months. Wrap the entire pie tightly in plastic wrap, followed by a layer of foil to protect against freezer burn. If you plan to serve it frozen, simply slice and serve directly from the freezer. If you prefer a softer texture, transfer the pie to the refrigerator a few hours before serving to allow it to thaw gradually.
Reheating Not Required
This is a chilled dessert, so no reheating is necessary. If you want to soften a frozen pie more quickly, let it sit at room temperature for about 15 minutes before slicing.
Frequently Asked Questions
Can I Make This Pie Ahead of Time?
Yes, Easy Peanut Butter Pie is an ideal make-ahead dessert. You can prepare it up to two days in advance and store it covered in the refrigerator. It also freezes beautifully, so you can make it weeks ahead if needed.
Can I Use a Store-Bought Crust?
Absolutely. While a homemade Oreo crust tastes fresher, a premade chocolate cookie crust saves time. Just make sure the premade crust is deep enough to hold all the filling.
Is This Pie Gluten-Free?
Not with a traditional Oreo crust. However, you can easily make it gluten-free by using gluten-free chocolate sandwich cookies instead.
Can I Substitute Cool Whip for Fresh Whipped Cream?
Yes, you can substitute an equal amount of Cool Whip for the whipped cream. The texture will be slightly less rich, but the pie will still taste great and hold its shape well.
Can I Use Crunchy Peanut Butter?
Yes, if you like extra texture in the filling, crunchy peanut butter works well. Just make sure to beat it thoroughly with the cream cheese to ensure even distribution.
What is the Best Way to Cut Clean Slices?
For clean, bakery-style slices, dip a sharp knife into hot water, wipe it dry, and slice through the pie. Repeat this process between cuts to keep the edges neat.
Can I Use a Graham Cracker Crust Instead?
Yes. If you prefer a lighter flavor or do not have Oreos, a graham cracker crust works well. However, the chocolate and peanut butter combination is what makes this version particularly indulgent.
How Can I Make This Pie Dairy-Free?
To make a dairy-free version, use dairy-free cream cheese, whipped topping, and plant-based butter. Several high-quality non-dairy cream cheeses and whipped creams are available, making this an easy adaptation.
Conclusion
Easy Peanut Butter Pie is the perfect dessert for peanut butter lovers who want a simple yet impressive treat. With its no-bake simplicity, rich creamy filling, and irresistible Oreo crust, it works for almost any occasion — from casual family dinners to holiday celebrations.
Because it can be made ahead and served straight from the fridge or freezer, it is an ideal dessert for entertaining. You can even customize it to match your favorite flavors, adding caramel, candy, or seasonal garnishes.
Whether you are an experienced baker or just starting out, this recipe delivers guaranteed success. One bite and you will see why this Easy Peanut Butter Pie belongs in every dessert rotation.
Easy Peanut Butter Pie
Ingredients
- For the Chocolate Pie Crust:
- 24 Oreo cookies regular, not double-stuffed
- 5 tablespoons unsalted butter melted
- For the Peanut Butter Filling:
- 1 cup whipping cream
- 2 tablespoons powdered sugar
- 8 ounces cream cheese softened
- 1/2 cup creamy peanut butter
- 1/2 cup powdered sugar
- 1 teaspoon vanilla extract
- For the Toppings:
- 1/2 cup chopped peanuts
- 1/4 cup chocolate syrup optional
- 1/4 cup butterscotch syrup optional
Instructions
- Prepare the Crust:Grease a 9-inch pie plate.Crush the Oreo cookies in a food processor or blender until fine crumbs form.In a small bowl, mix the crumbs with melted butter until evenly combined.Press the mixture firmly into the bottom and up the sides of the pie pan.Refrigerate for at least 30 minutes to set.Make the Peanut Butter Filling:In a mixing bowl, beat whipping cream and 2 tablespoons powdered sugar on medium speed until stiff peaks form. Set aside.In a separate bowl, beat cream cheese until smooth.Add peanut butter, 1/2 cup powdered sugar, and vanilla extract, then beat until creamy and well blended. Scrape down the sides as needed.Gently fold the whipped cream into the peanut butter mixture using a spatula.Spoon the filling into the cooled pie crust and spread evenly.Garnish & Chill:Sprinkle chopped peanuts on top. If desired, drizzle with chocolate and/or butterscotch syrup.Chill in the refrigerator for at least 2 hours or freeze for a firmer texture.
Notes
Storage: Keep covered in the refrigerator or freezer. Leftovers should be stored in the fridge.
Homemade Whipped Cream: This pie uses fresh whipped cream instead of Cool Whip for a richer flavor.
Serving Tip: Serve chilled from the fridge for a creamy texture or frozen for a firmer, ice-cream-like dessert.

Leave a Comment