Lemon curd is a classic, creamy spread made from simple ingredients like fresh lemons, sugar, eggs, and butter. Its bright, tangy flavor and smooth texture make it a favorite in both sweet and savory kitchens. Whether you are topping a scone or filling a tart, lemon curd brings a bold punch of citrus that’s hard to resist.
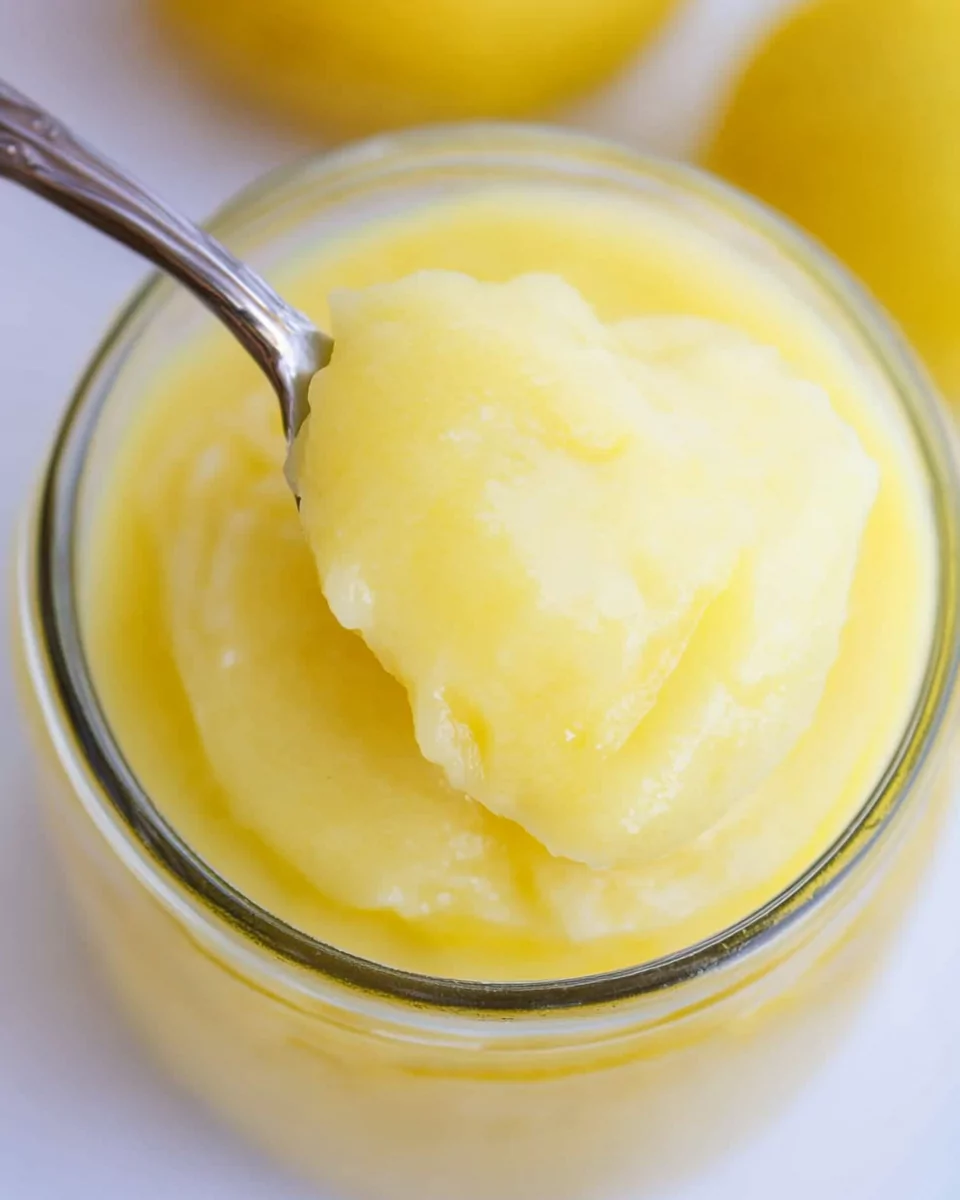
What makes this easy lemon curd recipe so special is its simplicity. It uses basic kitchen staples and requires no fancy equipment, yet the result is rich, silky, and bursting with fresh lemon flavor. Homemade lemon curd tastes far better than anything you can buy at the store. It’s fresher, brighter, and completely free of preservatives.
This easy lemon curd recipe is perfect for beginners. The step-by-step process ensures success, and you’ll learn useful techniques like tempering eggs and straining curd for a flawless finish. Whether you need a quick topping for pancakes or a filling for layered cakes, this recipe is versatile and guaranteed to impress.
Why You’ll Love This Easy Lemon Curd Recipe
- Bold, fresh lemon flavor from real lemons
- Smooth, creamy texture without any artificial thickeners
- Quick and simple process — ready in under 30 minutes (plus chilling)
- Easily customizable for different levels of sweetness or richness
- Perfect for spreading, filling, or drizzling on your favorite treats
Essential Tools and Equipment
Before you start, gather these essential tools to make the process easy and efficient:
- Heavy-bottomed saucepan — Ensures even heat distribution to avoid scorching the curd.
- Whisk — Essential for smooth blending and preventing lumps.
- Fine-mesh strainer — Helps remove any bits of cooked egg for a perfectly silky curd.
- Heatproof bowl — Ideal for whisking and tempering the eggs.
- Zester and juicer — For extracting maximum flavor from the lemons.
- Airtight container — To store the finished curd.
Preparation Tips for Perfect Lemon Curd
- Choose the Right Lemons: Fresh, juicy lemons with bright skin provide the best flavor.
- Zest First: Zest the lemons before juicing them to avoid waste.
- Separate Eggs Carefully: Avoid getting any yolk into the whites if you want to save the whites for another recipe.
- Temper Gradually: Slowly adding the hot lemon mixture to the eggs prevents scrambling.
- Constant Whisking: This keeps the curd smooth and evenly cooked.
Ingredients List
- 1 tablespoon lemon zest (optional, for extra flavor)
- ¾ cup fresh lemon juice (from about 3-4 large lemons)
- ¾ cup granulated sugar
- ¼ teaspoon salt
- 3 large eggs
- 4 large egg yolks
- 4 tablespoons unsalted butter, chopped
Step-By-Step Directions
1. Heat the Lemon Mixture
In a medium saucepan over medium heat, combine the lemon zest, lemon juice, sugar, and salt. Stir occasionally for about 5 minutes, until the sugar fully dissolves.
2. Temper the Eggs
In a heatproof bowl, whisk together the eggs and egg yolks. Slowly drizzle in about half of the warm lemon mixture while whisking constantly. This process gently warms the eggs without cooking them too fast.
3. Cook the Curd
Pour the tempered egg mixture back into the saucepan with the remaining lemon mixture. Return to medium heat and cook, whisking continuously, until the mixture thickens. This usually takes about 5 minutes. You’ll know it’s ready when you can drag a whisk through the curd and it briefly holds the line.
4. Strain for Smoothness
Immediately strain the hot curd through a fine-mesh sieve into a clean bowl. This removes any bits of cooked egg for a silky texture.
5. Add Butter
Stir the chopped butter into the warm curd until fully melted and incorporated. This step adds richness and a glossy finish.
6. Chill
Press a piece of plastic wrap directly onto the surface of the curd to prevent a skin from forming. Refrigerate for at least 2 hours until fully set.
7. Store and Serve
Transfer the chilled curd to an airtight container. Store in the refrigerator for up to 2 weeks, or freeze for up to 3 months. Use it as a spread, filling, or topping for your favorite baked goods.
This easy lemon curd recipe delivers the perfect balance of sweet, tart, and creamy. Whether you’re hosting brunch or making a homemade gift, this lemon curd is a versatile, crowd-pleasing addition to your recipe collection.
Serving Suggestions
Once you’ve made a batch of this silky, citrusy easy lemon curd, there are countless ways to enjoy it. Its smooth texture and vibrant flavor make it a versatile addition to both breakfast spreads and elegant desserts.
Here are some of the best ways to serve lemon curd:
- Spread on toast, English muffins, or crumpets – The bright lemon pairs perfectly with buttery bread.
- As a filling for cakes, cupcakes, or tarts – Lemon curd adds a burst of flavor between cake layers or inside delicate pastries.
- Swirled into yogurt or oatmeal – This instantly upgrades a simple breakfast.
- Drizzled over pancakes, waffles, or crepes – It brings a bright, tangy contrast to sweet batter.
- Topped on cheesecake or pavlova – Lemon curd adds vibrant color and fresh flavor.
- Served alongside shortbread cookies – This classic pairing is always a hit.
- As part of a dessert board – Include lemon curd with fresh berries, whipped cream, and pastries.
- Used in trifles and parfaits – Layer it with cake, cream, and fruit for a show-stopping dessert.
No matter how you serve it, homemade lemon curd elevates even the simplest dish with its bold, fresh flavor.
Common Mistakes To Avoid & How to Perfect the Recipe
Even though this easy lemon curd recipe is beginner-friendly, there are a few common pitfalls to watch for. By understanding these mistakes, you’ll get perfect curd every time.
Overheating the Eggs
- Applying too much heat too quickly causes the eggs to scramble, leaving you with curdled or lumpy curd.
- Solution: Use medium heat and whisk constantly.
Skipping the Tempering Step
- If you add the hot lemon mixture directly to the eggs, they can cook too fast and curdle.
- Solution: Gradually drizzle in the warm liquid while whisking constantly to slowly raise the egg temperature.
Forgetting to Strain the Curd
- Even with careful cooking, tiny bits of egg may solidify.
- Solution: Always strain the finished curd through a fine-mesh sieve for silky texture.
Adding Butter Too Early
- If the butter is added before cooking, the fat can interfere with the thickening process.
- Solution: Stir in butter after the curd thickens, off the heat.
Improper Storage
- Lemon curd exposed to air develops a skin on top.
- Solution: Press plastic wrap directly onto the surface before chilling.
Side Dish Recommendations – 8 Perfect Pairings
Lemon curd’s versatility makes it an ideal complement to all kinds of baked goods and desserts. Here are eight fantastic sides to serve alongside your freshly made curd:
1. Classic Scones
- Buttery scones are a natural partner for lemon curd. Add clotted cream for the ultimate tea-time treat.
2. Almond Croissants
- Slice open a flaky almond croissant and spoon in a little curd for a burst of flavor.
3. Shortbread Cookies
- Crisp, buttery cookies balance the tangy curd beautifully.
4. Fluffy Pancakes
- Skip the syrup and spoon warm lemon curd over a tall stack of pancakes.
5. Honey Drizzle Greek Yogurt
- Swirl lemon curd into plain Greek yogurt with a drizzle of honey and some granola.
6. Vanilla Pound Cake
- Spread a layer of curd over pound cake slices for an easy, elegant dessert.
7. Poppy Seed Muffins
- Lemon curd and lemon poppy seed muffins are a flavor match made in heaven.
8. Fresh Berry Salad
- Combine strawberries, blueberries, and raspberries with a dollop of lemon curd for a fresh, vibrant side.
This easy lemon curd recipe offers endless possibilities. Whether you enjoy it for breakfast, dessert, or afternoon tea, this homemade version outshines anything you can buy at the store. With its bold flavor and silky texture, it’s the perfect finishing touch to so many dishes.
Let me know if you’d like me to move on to Part 3, or if you need any additional variations, tips, or serving ideas for this recipe.
Recipe Tips & Tricks
Perfecting this easy lemon curd recipe doesn’t require expert skills, but a few insider tips can make all the difference between good curd and truly exceptional curd.
Use Fresh Lemons
Freshly squeezed lemon juice delivers a far brighter and more vibrant flavor than bottled juice. Meyer lemons can also be used for a sweeter, less tangy twist.
Zest First, Juice Second
Always zest the lemons before cutting them for juicing. It’s much harder to zest after they’re cut.
Use Room Temperature Eggs
Room temperature eggs incorporate more smoothly into the lemon mixture. Cold eggs are more likely to cause curdling when combined with hot liquids.
Temper Slowly and Stir Constantly
Tempering the eggs (slowly introducing warm liquid into them) is crucial to prevent them from scrambling. Stir constantly while adding the hot liquid to ensure even heating.
Strain for Silky Perfection
Even with perfect technique, small bits of egg can occasionally cook in the mixture. Straining the finished curd removes any unwanted lumps and guarantees a smooth, professional texture.
Butter for Richness
Stirring in butter at the end gives the curd a luxurious, glossy finish. If you prefer a richer curd, you can even double the butter.
Adjust Sweetness to Taste
This recipe strikes a balanced sweet-tart flavor, but you can easily adjust the sugar slightly if you prefer a sweeter curd.
Storage and Reheating Instructions
Short-Term Storage
Once the curd is cooked and chilled, transfer it to an airtight container. Stored properly, it keeps in the refrigerator for up to 2 weeks.
Preventing a Skin
To prevent a skin from forming on top, press a piece of plastic wrap directly onto the surface of the curd before sealing the container.
Freezing Lemon Curd
Lemon curd freezes surprisingly well. Place the curd in a freezer-safe airtight container, leaving a little headspace for expansion. Freeze for up to 3 months.
- To thaw, transfer to the refrigerator overnight. Stir before using to restore its smooth texture.
Reheating (Optional)
If you want to gently warm lemon curd for serving (for example, to drizzle over pancakes), do so over very low heat in a small saucepan. Stir constantly and avoid overheating to prevent curdling.
Frequently Asked Questions (FAQs)
What is lemon curd used for?
Lemon curd is extremely versatile. It works as a spread, filling, topping, or ingredient in a wide range of sweet dishes. Popular uses include spreading on scones, filling cakes and tarts, layering into trifles, and drizzling over pancakes.
Is homemade lemon curd better than store-bought?
Yes. Homemade lemon curd has a fresher, brighter flavor because it’s made with real lemons and without artificial preservatives. The texture is also silkier, and you can adjust the sweetness and tang to your taste.
Can I make lemon curd without butter?
Yes, though the butter adds richness and a smooth mouthfeel. For a dairy-free version, you can substitute vegan butter or coconut oil, though the flavor will change slightly.
Why is my lemon curd lumpy?
Lumps often occur if the eggs cook too fast or unevenly. This can happen if you skip tempering or cook the curd over high heat. Straining the curd after cooking helps remove any lumps.
Can lemon curd be frozen?
Absolutely. Lemon curd freezes well and keeps for up to 3 months when stored in an airtight container. Thaw it in the refrigerator and stir before serving.
Can I use bottled lemon juice instead of fresh?
Fresh lemon juice is highly recommended for the best flavor, but bottled lemon juice can be used if necessary. The curd will still set properly, but the taste may be less vibrant.
What’s the difference between lemon curd and lemon custard?
Lemon curd is typically more intensely flavored and tangier because it uses a higher ratio of lemon juice. Lemon custard, on the other hand, often includes milk or cream and is milder.
How can I fix curd that’s too thin or too thick?
- If the curd is too thin, return it to low heat and cook a little longer while stirring constantly.
- If it’s too thick, you can gently whisk in a tablespoon or two of warm lemon juice to loosen the texture.
Conclusion
This easy lemon curd recipe offers everything you want in a homemade spread — it’s fresh, creamy, and bursting with bright citrus flavor. Whether you’re preparing a brunch spread, filling a cake, or looking for a unique homemade gift, this recipe delivers perfect results every time.
Best of all, this lemon curd is incredibly versatile. You can adjust the sweetness, add extra butter for richness, or even infuse it with herbs or vanilla for a creative twist. Once you’ve made your first batch, you’ll understand why homemade lemon curd is such a cherished recipe.
If you’ve been relying on store-bought curd, now’s the time to upgrade your cooking game. This easy lemon curd recipe is faster and simpler than you might expect — and the flavor is unbeatable. Give it a try and discover a new kitchen essential.
Easy Lemon Curd Recipe
Ingredients
- 1 tablespoon lemon zest optional, for extra tang
- 3/4 cup fresh lemon juice about 3-4 large lemons
- 3/4 cup sugar
- 1/4 teaspoon salt
- 3 large eggs
- 4 large egg yolks
- 4 tablespoons butter 1/2 stick, chopped
Instructions
- Heat the Lemon Mixture: In a small saucepan over medium heat, combine the lemon zest, lemon juice, sugar, and salt. Cook for about 5 minutes, stirring occasionally, until the sugar and salt dissolve.
- Temper the Eggs: In a separate medium bowl, whisk together the eggs and egg yolks until well combined. Slowly pour some of the heated lemon mixture into the eggs, whisking constantly, to temper them. (About half the liquid should be added gradually.)
- Cook Until Thickened: Return the pot to the stove over medium heat and slowly stir in the tempered eggs, whisking continuously to prevent curdling. Cook for about 5 minutes, stirring constantly, until the mixture thickens. You’ll know it’s ready when you can drag a whisk through it and see visible marks.
- Strain the Curd: Pour the thickened lemon curd through a fine-mesh strainer into a clean bowl to remove any solid egg bits.
- Incorporate the Butter: Stir in the chopped butter until completely melted and combined.
- Chill: Press a piece of plastic wrap directly onto the surface of the curd to prevent a skin from forming. Refrigerate for 2-4 hours, until fully chilled and thickened.
- Store & Serve: Transfer to an airtight container and keep refrigerated for 1-2 weeks. Serve on toast, scones, pancakes, or as a filling for desserts.


Leave a Comment